The Dermatology Patient Workflow: Skin-Clinic Software Inside Your Dental System
DentalPro doubles as skin & aesthetics software. Flip one toggle and a patient’s clinical screens switch from the dental tooth chart to a full dermatology workspace — assessment, treatments, prescriptions and reports. Here is the complete workflow, with real screenshots.
Plenty of clinics do both teeth and skin — a dentist who also offers facials and peels, or a group running a dental unit next to an aesthetics room. The usual pain is software: your dental system has no place to record a Fitzpatrick type or a laser session, so skin work ends up in a notebook. DentalPro solves this by building a full dermatology workspace into the same system. One toggle turns a patient’s clinical screens from the tooth chart into a skin workflow, while everything else — appointments, billing, WhatsApp, the patient app — stays exactly the same.
Here is the entire workflow, screen by screen.
1. Register the patient — and flip one toggle
You register a skin patient the same way as anyone else: tap New Patient and enter a name (everything else is optional). The only difference is the Derma Patient toggle. Turn it on before saving and this record is flagged as a dermatology patient, so its clinical tabs open the skin workspace instead of the FDI dental chart.
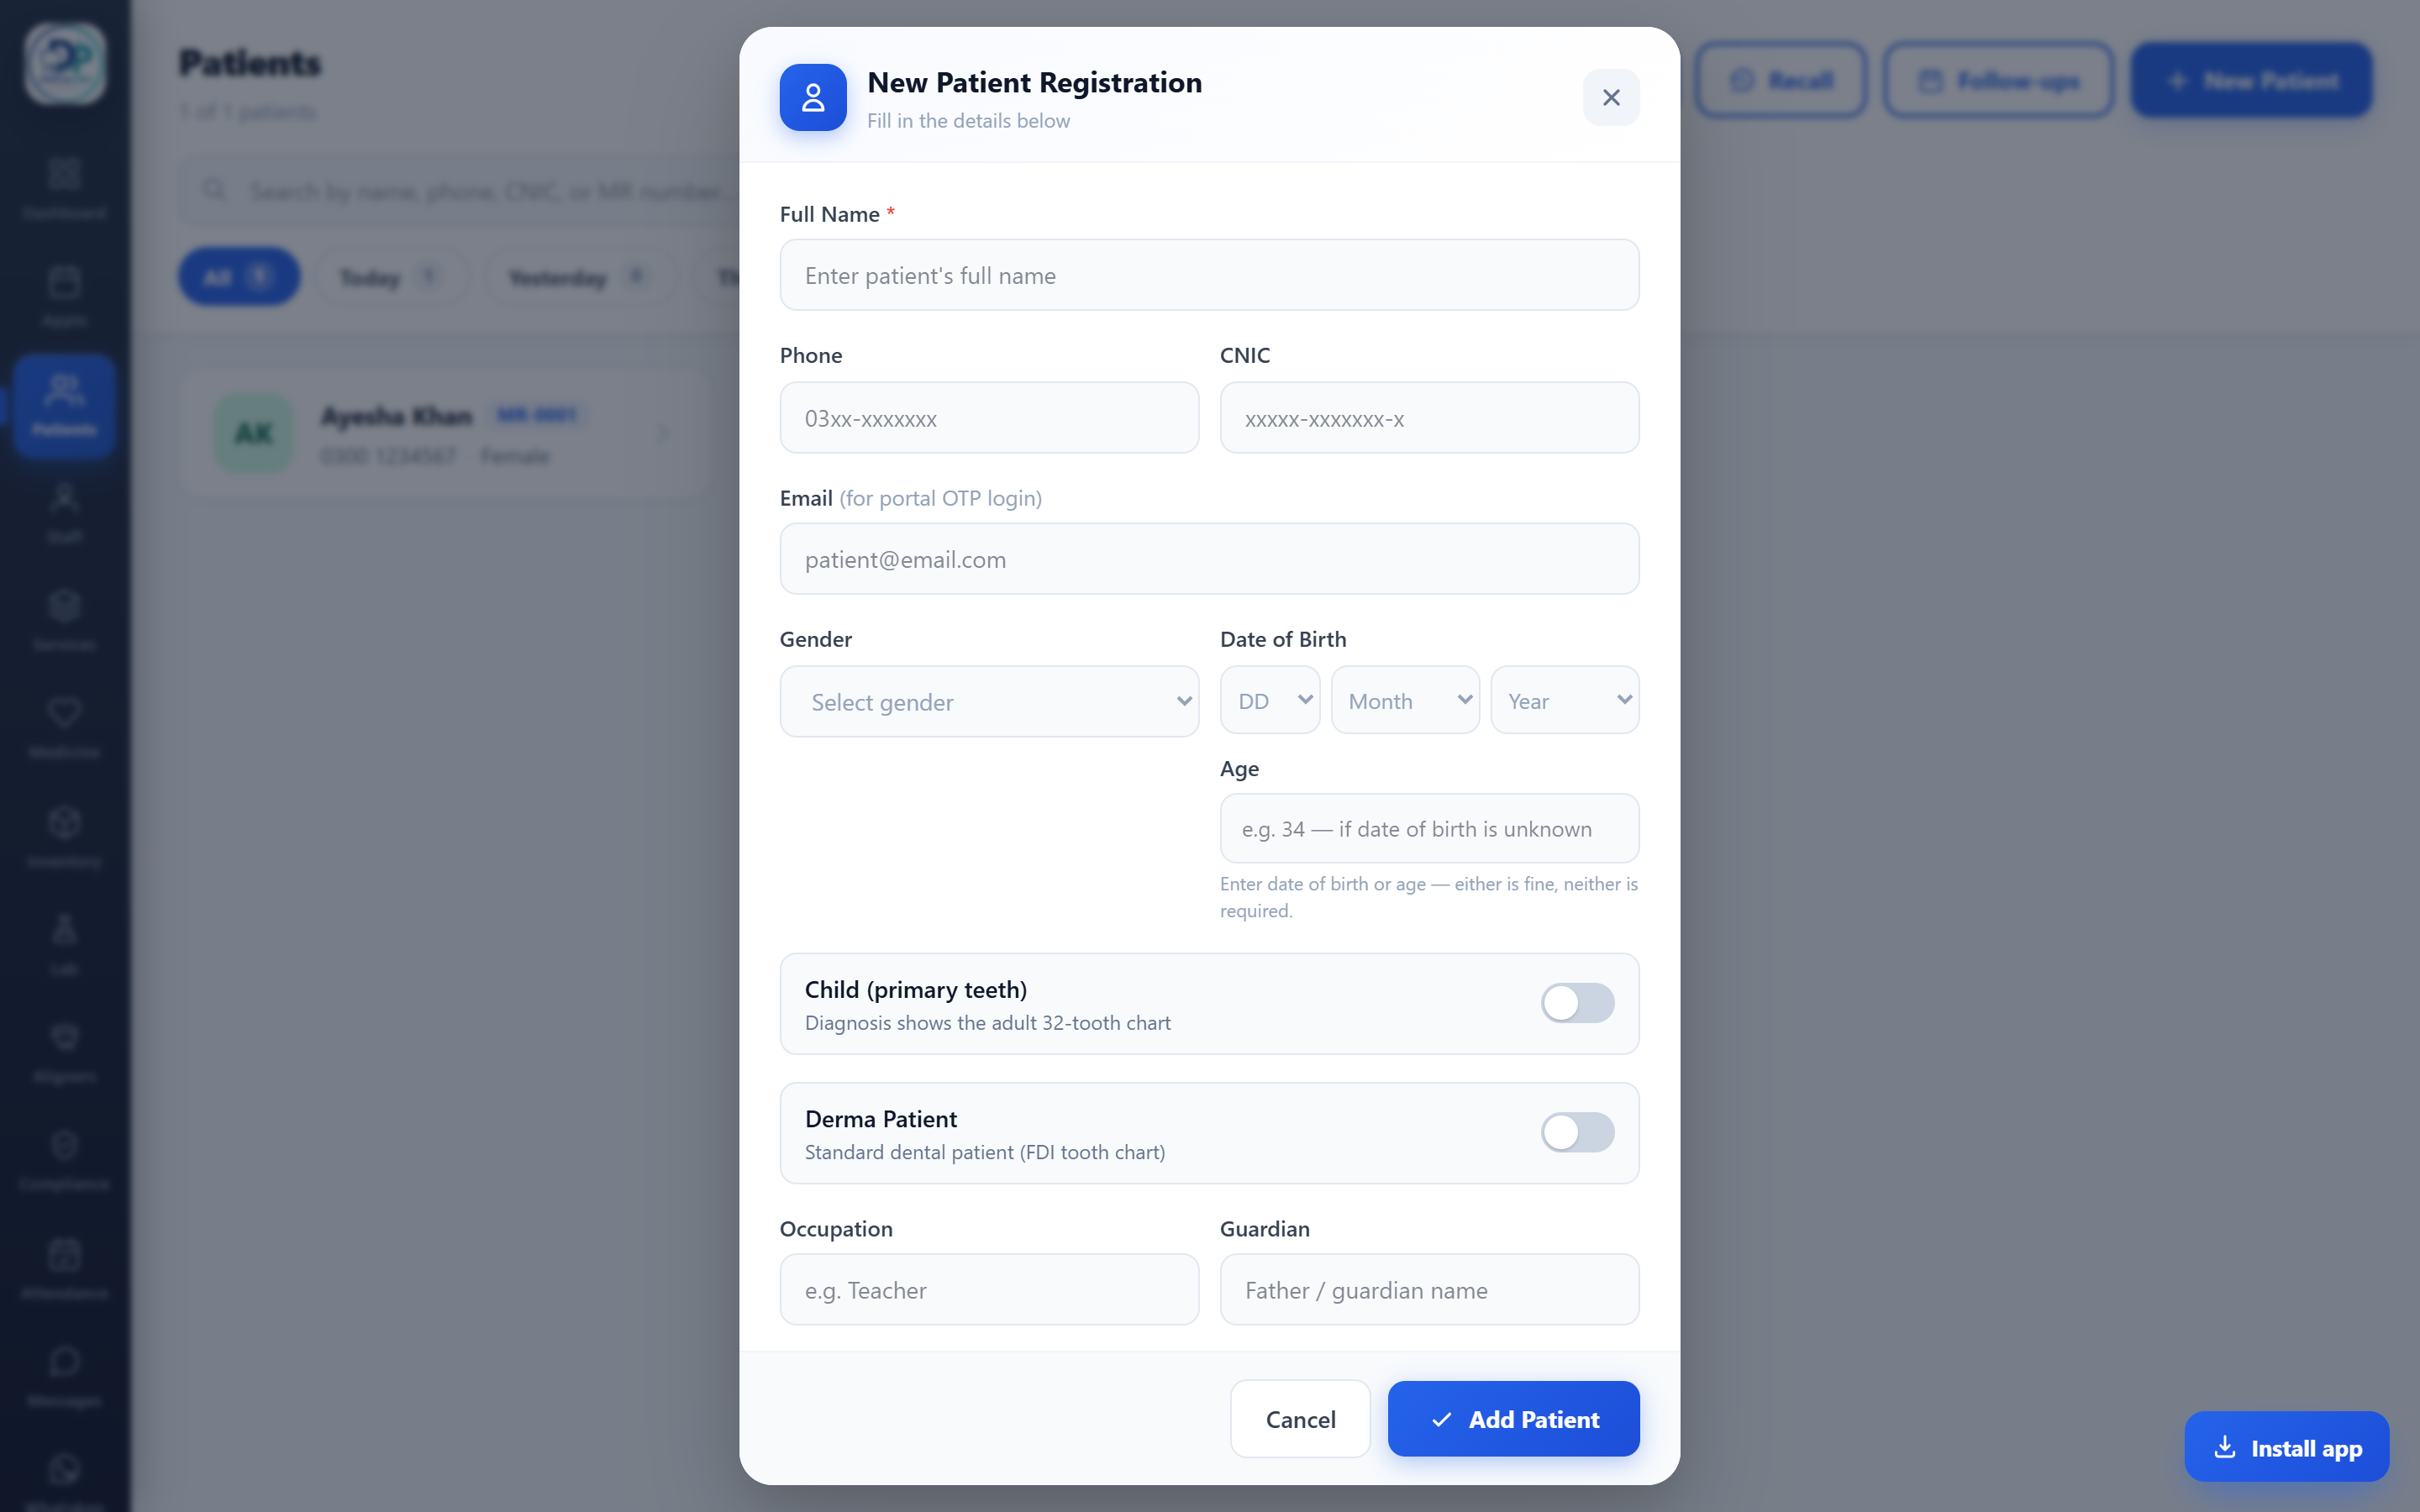
Nothing else about the patient changes. Their profile, phone, appointments and billing behave identically — only the clinical tabs adapt to skin work.
2. Open the patient — the skin workspace
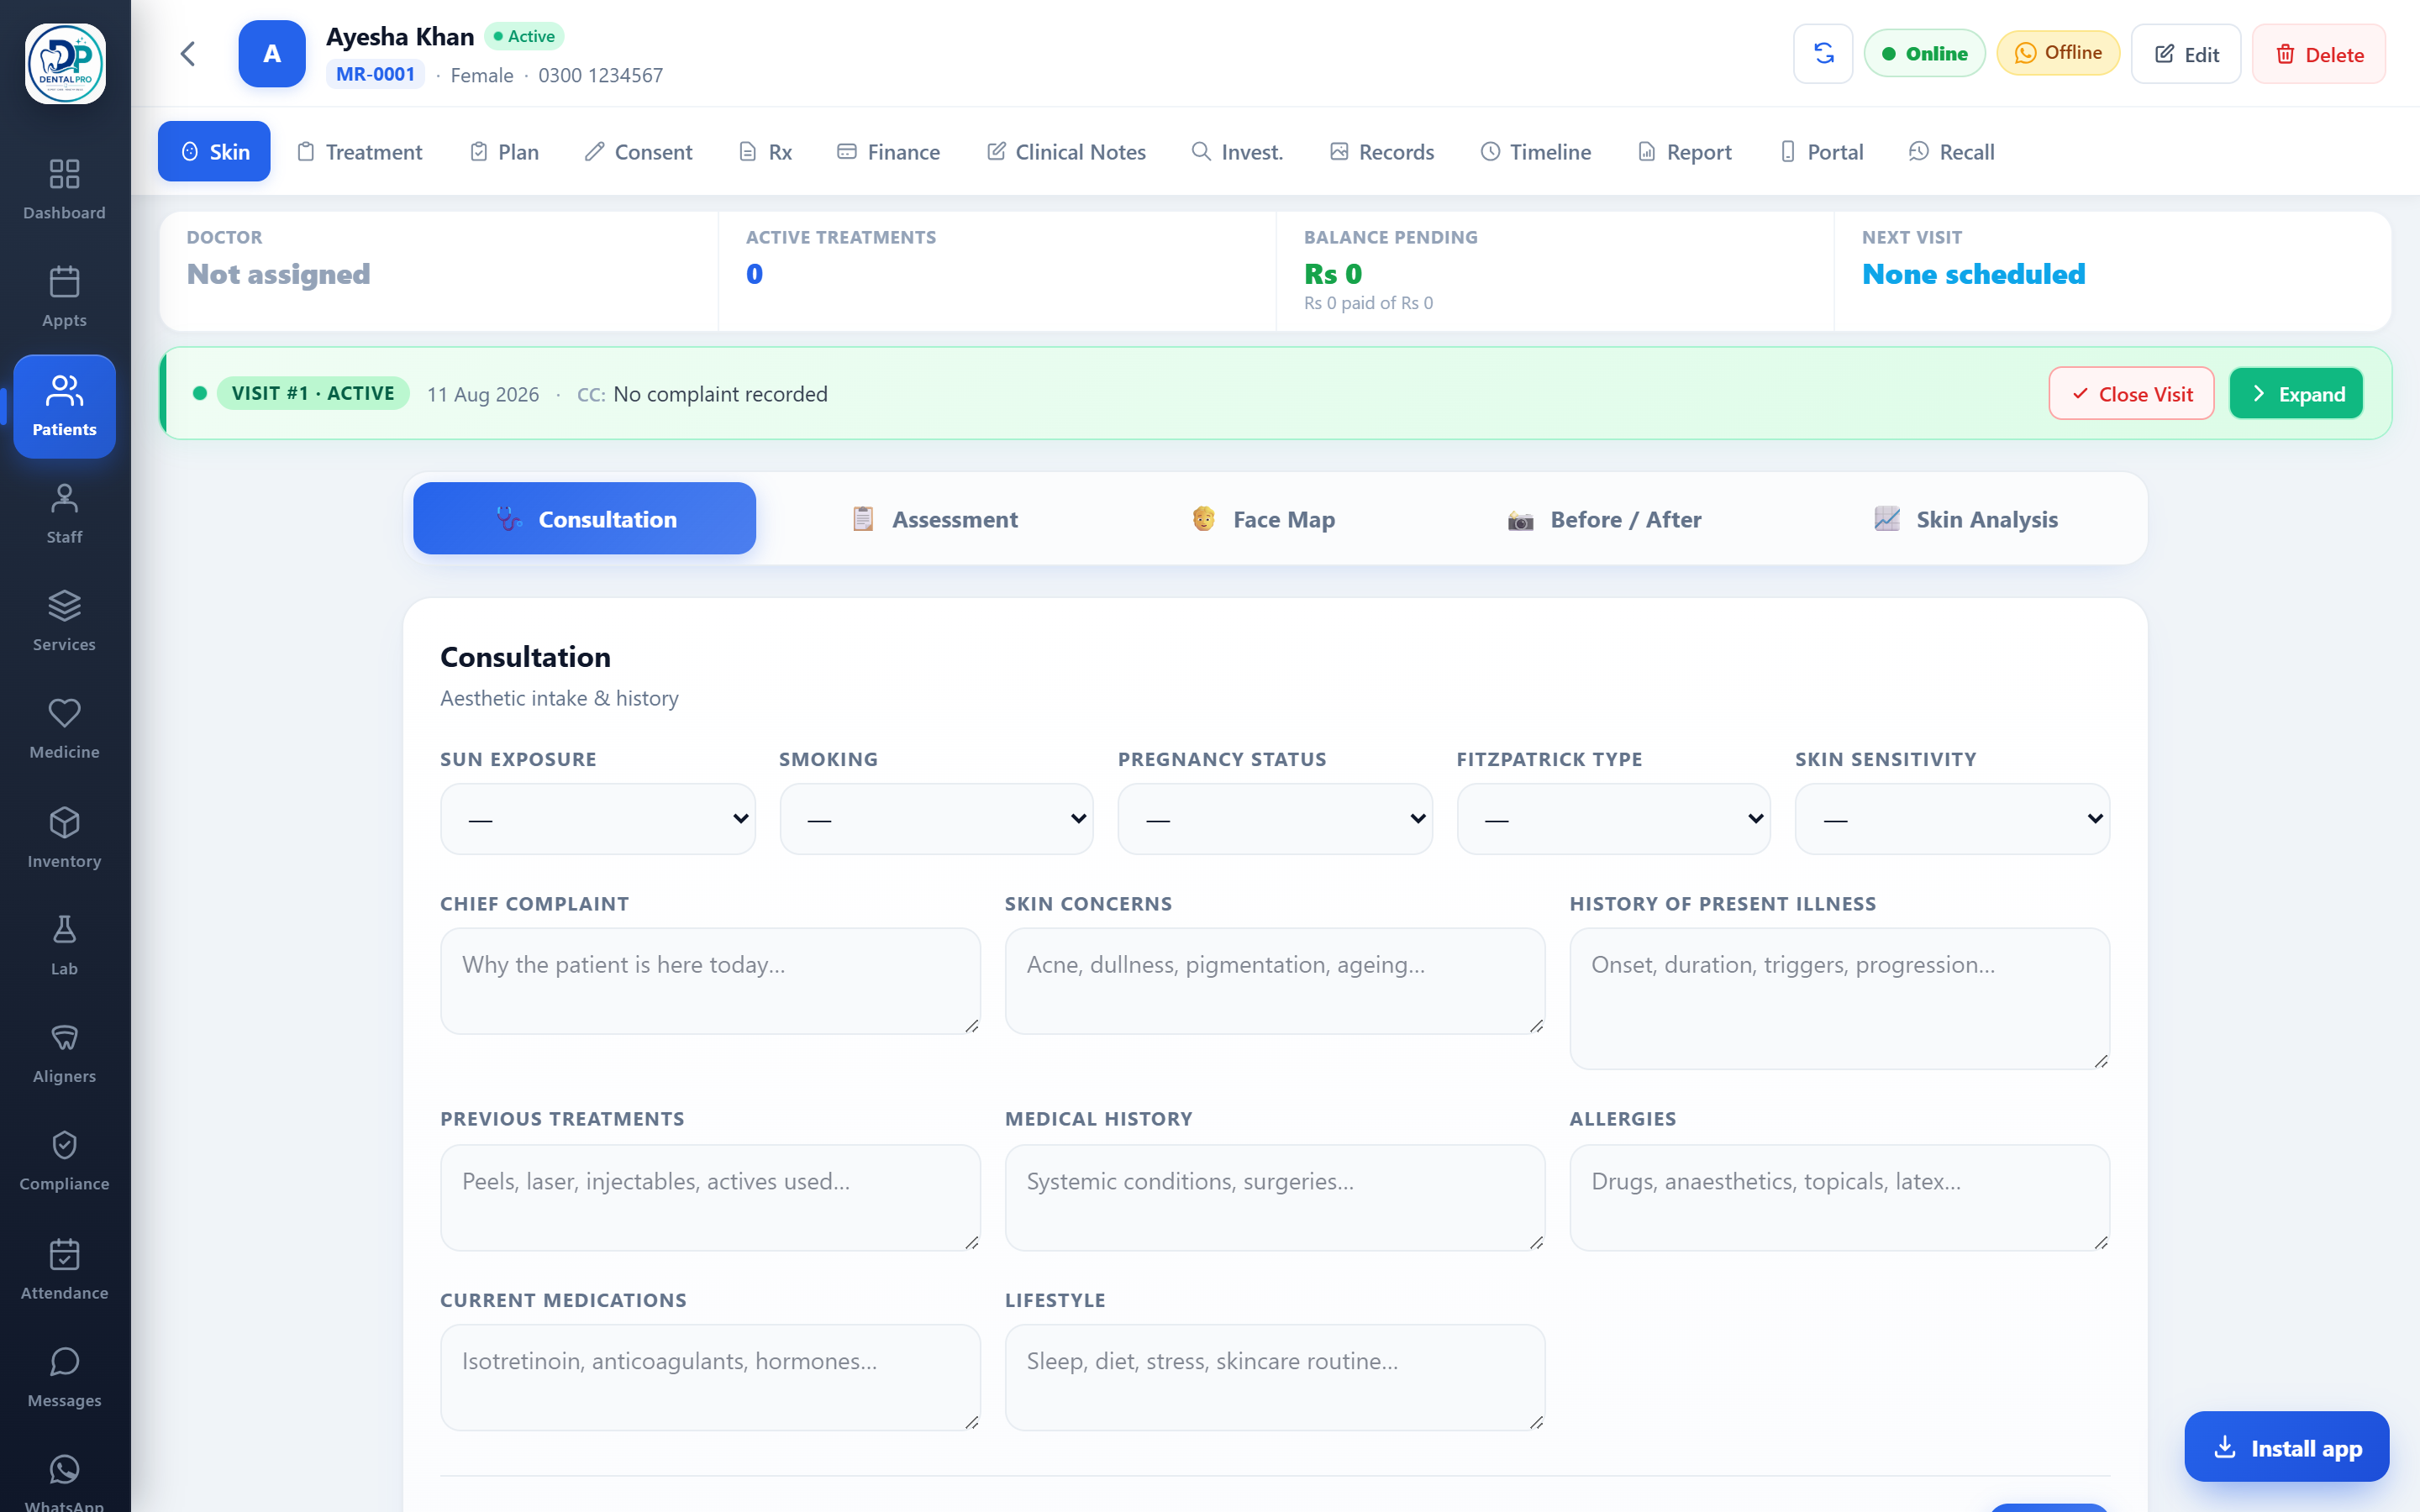
Open a derma patient and, instead of a tooth chart, the Diagnosis tab becomes a dedicated skin workspace. The Consultation view captures an aesthetic intake and history — sun exposure, smoking, pregnancy status, Fitzpatrick type, skin sensitivity, chief complaint, skin concerns, previous treatments, medications and allergies. Along the top you also get Assessment, a Face Map, Before / After photos and a Skin Analysis — the tools a skin clinic actually uses.
3. Plan & record skin treatments
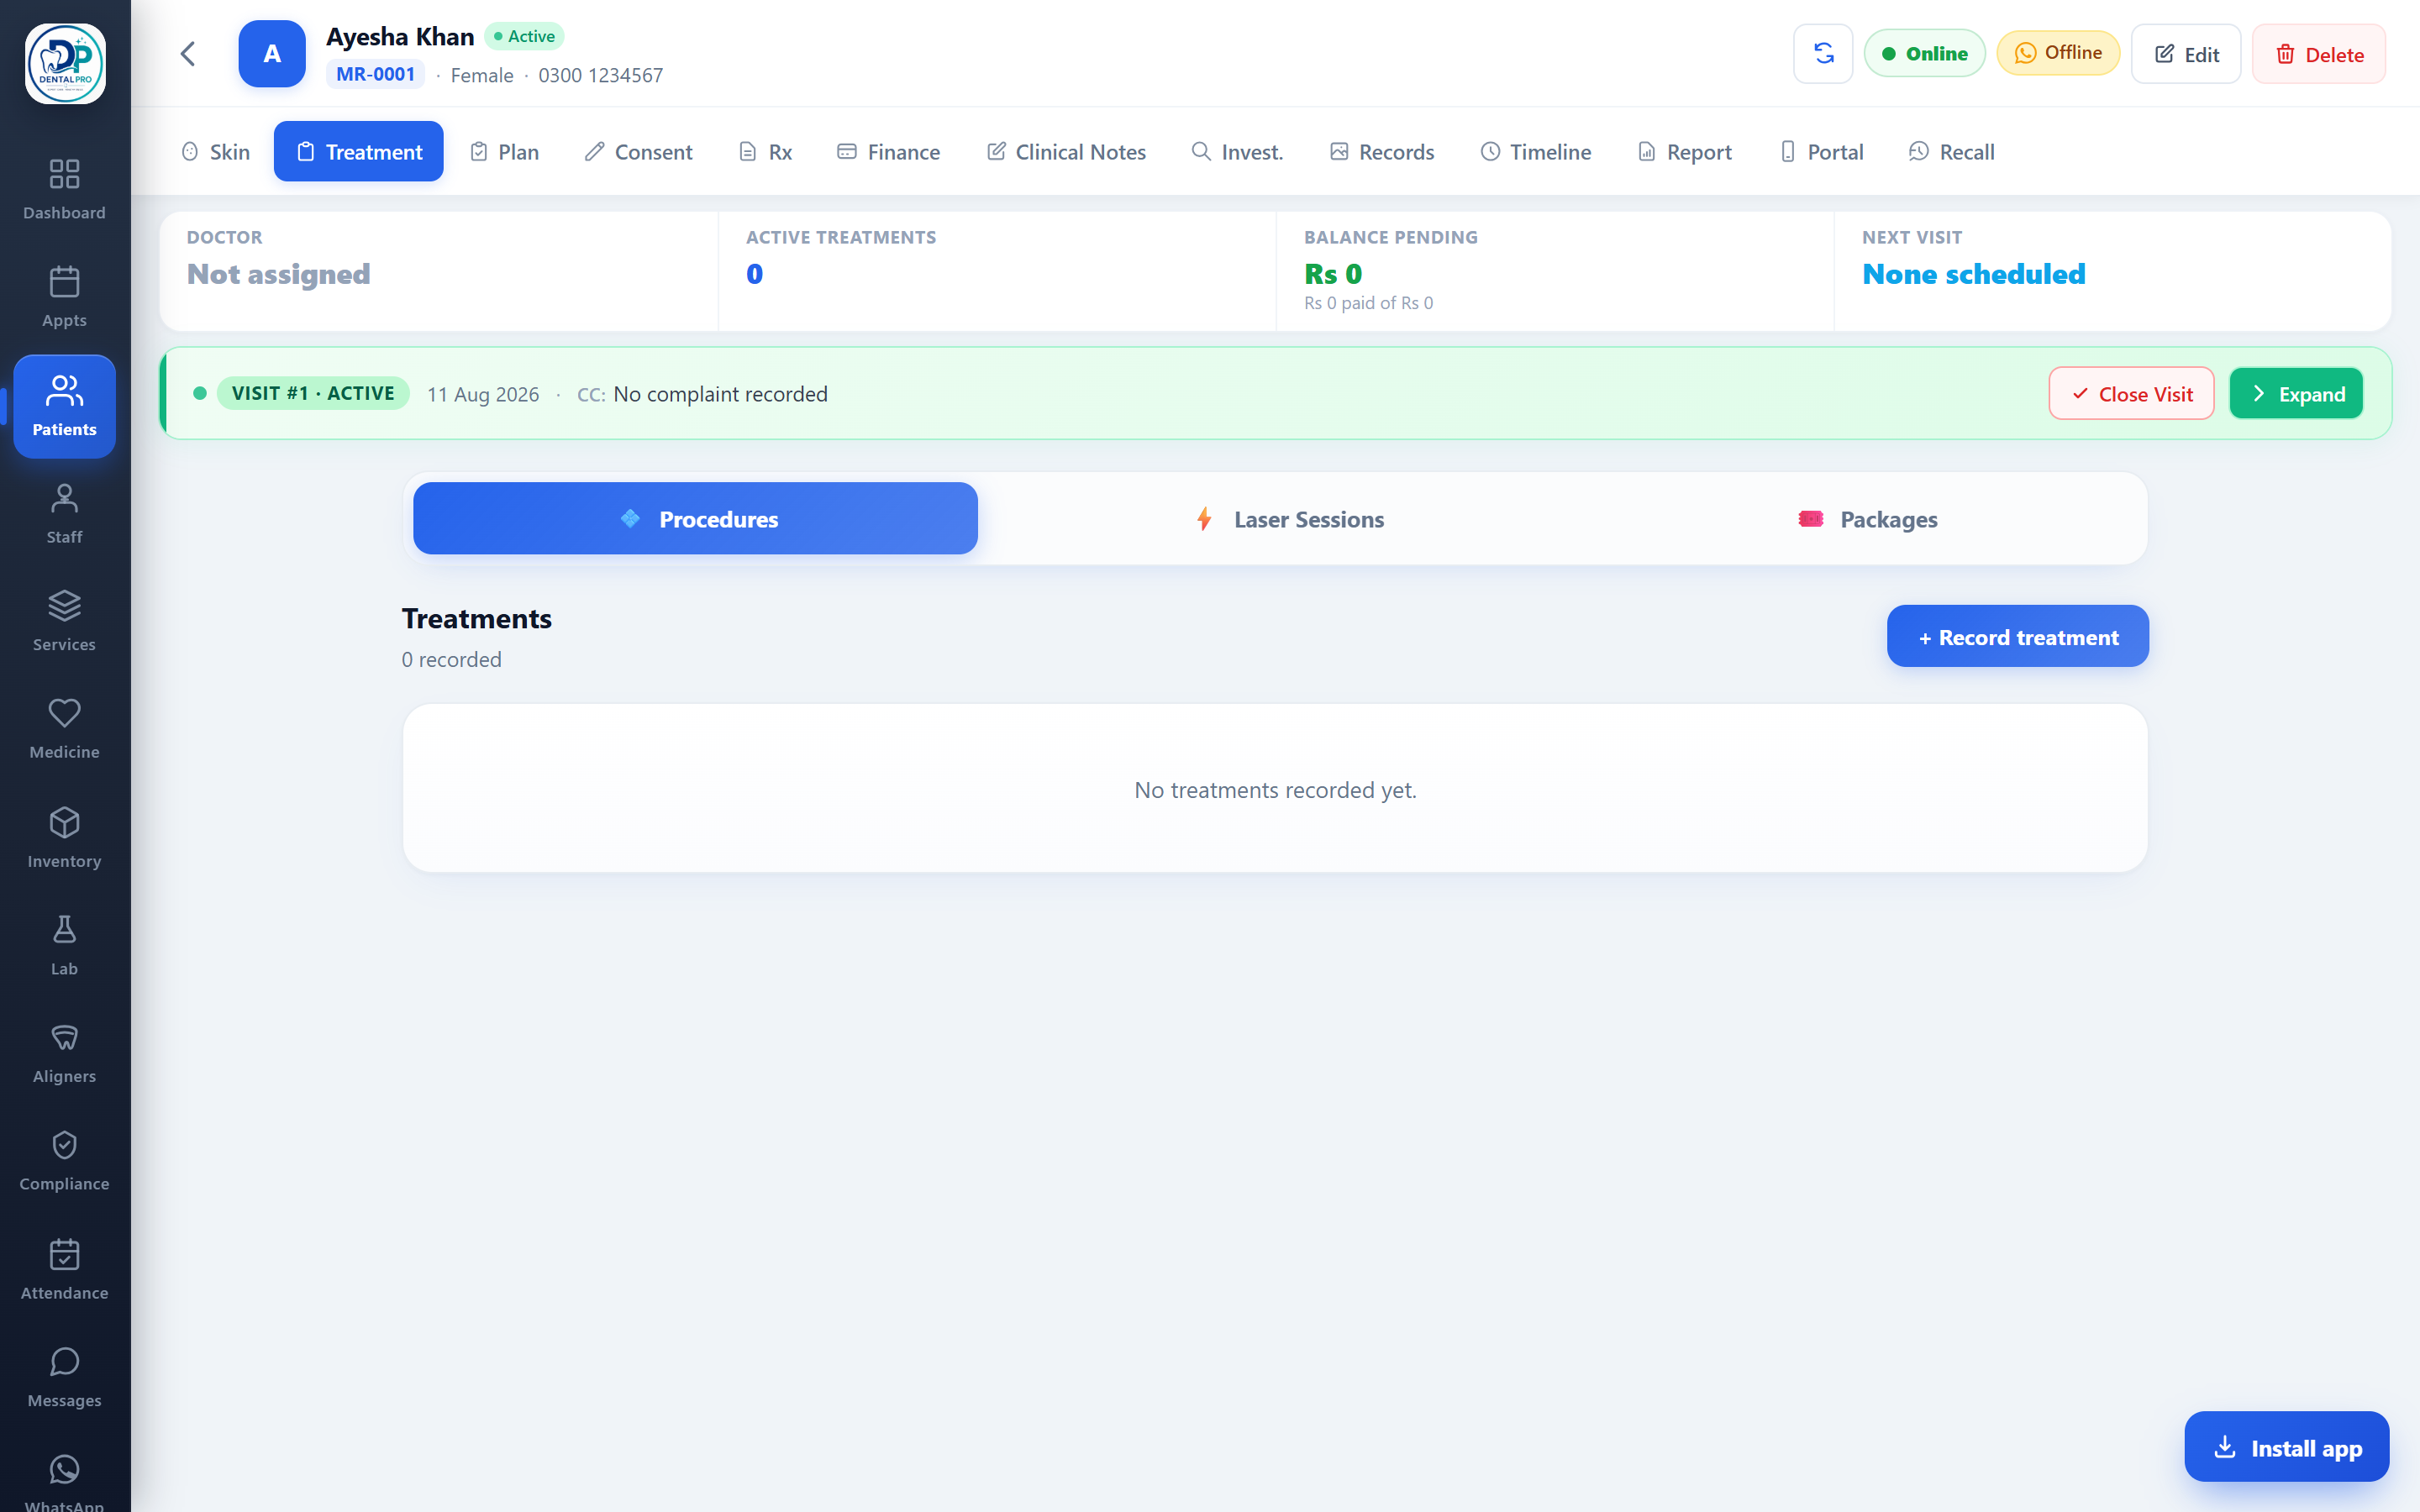
The Treatment tab becomes skin treatments: add the procedures, sessions, laser or package items the patient is having. Each is costed and flows straight into billing like any treatment. Because services are separated by discipline, the list only shows your skin procedures — no dental fillings cluttering an aesthetics plan.
4. Prescribe, consent, photograph, bill and report
The rest of the visit uses the same familiar tabs, adapted for skin:
- Rx — the medicine catalogue is scoped to your dermatology list, so you prescribe skin medicines and creams, then print, share on WhatsApp or download.
- Consent — capture consent for aesthetic procedures with an on-screen signature.
- Records — store before/after photos, lab results and documents on the patient’s timeline.
- Finance — skin treatments turn into invoices and payments exactly like dental work; collect cash or bank and send a WhatsApp receipt.
- Report — generate a dermatology-specific report of findings, treatments and plan.
Why running both in one system matters
A mixed clinic’s worst enemy is two systems that don’t talk. With the dermatology workspace built in, your front desk books skin and dental patients from the same calendar, your accountant sees one set of numbers, and your patients get one app and one WhatsApp thread. The clinical screens are the only thing that changes — and they change automatically, per patient, based on that single toggle. If you want the broader picture of what an all-in-one system should cover, see our guide to the best dental (and clinic) software, and how a patient portal keeps everyone in the loop.
Frequently asked questions
Can one clinic run both dental and dermatology patients?
Yes — that is the whole point. You register every patient the same way and simply switch on the Derma Patient toggle for skin cases. Appointments, reminders, billing, accounting and the patient app are shared; only the clinical tabs (assessment, treatment, report) change per patient.
How do I turn a patient into a dermatology patient?
When you register (or edit) a patient, turn on the Derma Patient toggle in the form. From then on that patient’s Diagnosis, Treatment and Report tabs open the skin workspace instead of the dental tooth chart.
Are skin services and medicines kept separate from dental ones?
Yes. Dermatology procedures and skin medicines live in their own lists (by discipline), so when you treat or prescribe for a derma patient you only see skin items — and dental patients never see them.
Is the dermatology workspace available on every plan?
The dermatology module is enabled per clinic. If you don’t see the Derma Patient toggle, ask your provider to switch the module on for your account.
See DentalPro in your own clinic
Charting, treatment plans, billing, accounting, WhatsApp reminders, a patient app and online booking, from one login. Start a 3-day free trial, no card needed.
Start free trial